Friday 23 May 2014

Shub-Work 05: Three Point Lighting

Hello everyone here is an update on my animation, as mentioned before I was going to look into three point lighting to make my scene more attractive to look at. I did some research on this and followed some tutorials, I even looked back at some old tutorials that was given to me from my time at uni. I then applied the three point lighting setup to my scene and it did improve my scene tremendously .
Here are some pictures that shows the process starting with the key light setup, then the fill light which is meant to lighting up the shadows around Albert a bit then the rim light which is to give a highlight around the character.
Key Light

 Fill Light

Rim Light

Removing the shadow of the character from Fill Light


Here is a comparison between the Old light Setup and the Final Light setup.
Old Light set up

Final Light setup

There might be some room for improvements for the animation but so far it looks complete, I might need to look back on this in the future but for now I am happy with the result.
So until the next blog post see you next time :)

Shub-Blog 01

Hey everyone sorry I haven't been blogging for almost two months I was busy upgrading my computer which became a lot of trouble but in the end it was all worth it. Luckily I had most of the parts like a new motherboard, processor and ram as well more memory. Then it all became so troublesome when I bought a new graphics card, it's an AMD Firepro W7000 workstation graphics card. When I acquired it I was so excited but then I realised the sucker was so big it was taking up so much room, I then had to get a new tower case. 
The new case was no bigger than my old one but the inside layout was different where every component can fit in nicely with out any trouble. So when I connected everything in (with some help from my sister) I was ready to start doing things but the monitor was not responding, I got some help from a couple of computer experts and they found out that my old monitor didn't have the right connections so I had to get a new.
After all that I had to reinstall all my programs which took a while but once it was all done my computer became fully operational. 
Here are some pictures of my upgraded computer and new monitor.


I still have some of my old parts like my speakers and keyboard because they still work :). I have started animating again which I will post it's progress soon so I will end todays post by asking if anyone else had this much trouble when upgrading or building a new computer.
Untill next time this is by for now :).

Saturday 1 March 2014

Shub-Work 04: Final Prop

Hey everyone it's update time, this one is about the final prop and the picture I decided to use for it.
When looking over the mountain picture I felt it was too cool and was a bit out of place, and when thinking about it I thought maybe I should go for a more nature route to give the pub more of a warm calm feel.
I began by making the template of what I feel the painting would look and then I started making the concept of what the prop and the painting would look like in the scene.

Painting Design 01

 Painting Design 02

Frame and Painting 01

 Frame and Painting 02

 Frame and Painting 03

 Frame and Painting Final

For me the hardest part in making this concept art was the colouring because I am no good at using photoshop when colouring pictures in a digital painting style. In my opinion it doesn't look that bad but the painting does give me inspiration to improve on my digital painting skills.
I mainly made the concept art to give me the idea of which colours to use for the wall for the scene, the texture for the frame prop and what the final picture frame would look like. I purposely made the painting's way of colouring and shading different then from my usual style hoping to give it a uniqueness to it. It's funny because the painting is just going to sit in the background for only a few seconds and yet I am making a nice painting.

Leave some feedback on what you think of my finished image. Next is to actually make the prop and set up the animation scene, so until next time take care.

Also does the painting look familiar to those who started at the same year at uni as me hmm.

Friday 21 February 2014

Shub-Work 03: The Scene set up and Concept Art for Painting Prop

Hey everyone here is an update on what i was doing for my animation.
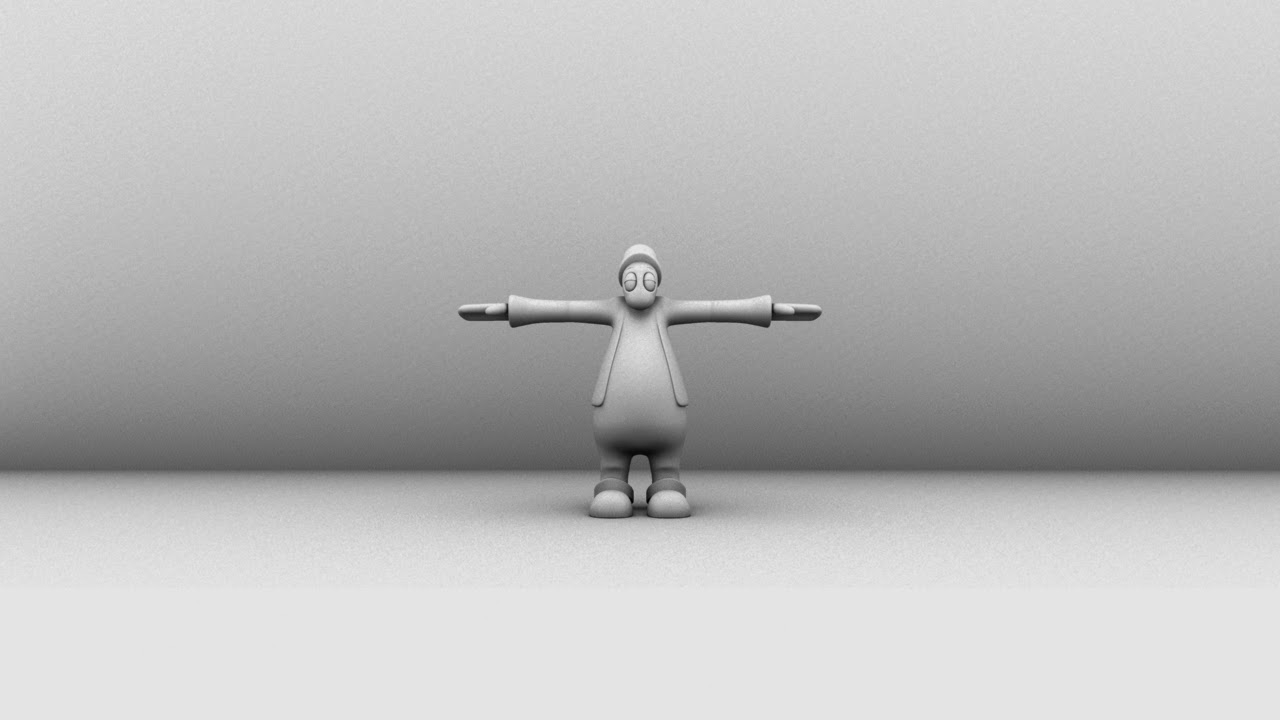
First here are some images that shows off my the type of lighting i was aiming for in my animation. I will still work on this mostly looking at three point lighting and maybe add to my model and props a toon shade or highlights just to experiment the different types of render effects for my animation. 
I don't like the background and floor  colours too much because they have roughly the same colour scheme as my character. I was trying to use colours that has a Victorian feel to them so I was using my character as reference, but that didn't work too well because it makes my character hard to see. I will keep looking until I find the right colour scheme for my background and floor.
I have also made the Ambient_Occlusion_Pass for my animation so the lights will sit on my character nicely. 

Scene set up

Ambient_Occlusion_Pass


I have also add some images to show off the placement of the spot light, from how big it should be to how the shadow will look when the light is bouncing off the model.

Closer look Spotlight and Shadow Placement

Ignore the odd lighting around the corners of the spotlight I was using render region only around the spotlight area near my character.
Spotlight and Shadow Placement 01

Spotlight and Shadow Placement 02

Spotlight and Shadow Placement 03

Spotlight and Shadow Placement 04

Spotlight and Shadow Placement Final

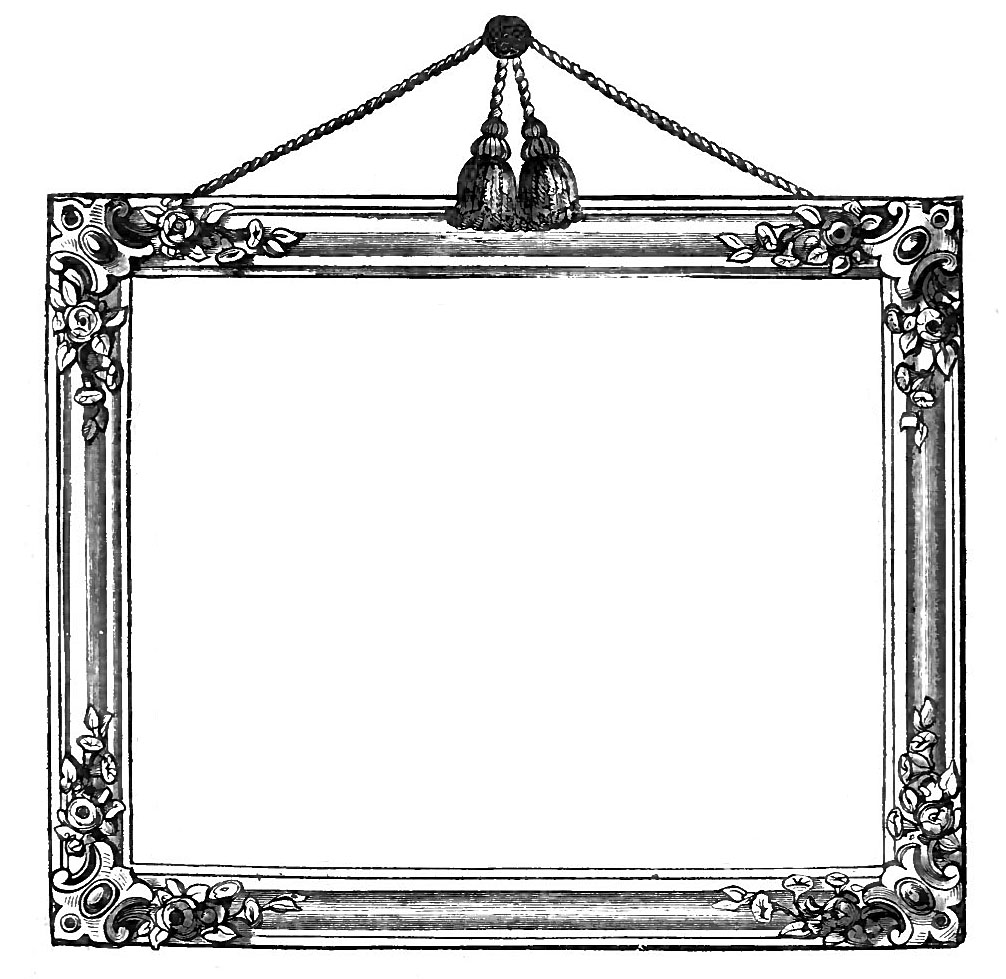
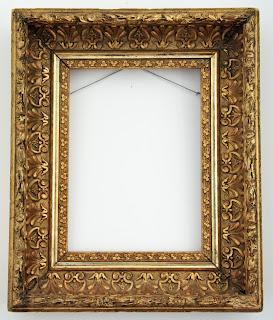
Finally, When I was looking at my animatic I notice that the background in the pub scene was actually really dull so I decided to add a painting in the background. I did some research on Victorian  picture frames and I notice they all have an ivy and flower theme to them but I felt they looked a bit rich and I don't feel that my pub would have a rich style looking frame. I think a more simple and nice picture frame would suit the scene so I tried to come up with my own but trying to keep the wavy motion that most Victorian picture frames would have as seen in Frame design 04. To me it looks great for my scene but you are welcome to leave some feedback on this.

Victorian Picture Frame Research 01

Victorian Picture Frame Research 02

Victorian Picture Frame Research 03

Victorian Picture Frame Research 04

Victorian Picture Frame Research 05

Frame Design 01

Frame Design 02

Frame Design 03

Frame and Mountain Design 04/01
However a Frame is not good without a painting or a picture to show and I remembered a picture a friend sent me which was a digital painting of Colorado. I felt this would suit my scene because it has nice warm colours that I felt would suit my pub scene very nicely. However when looking at it more carefully I notice that it does carry some modern things like a road and I think the telephone poles count as non Victorian. I thought I could try to recreate one of the elements that stand out the most to me and that is the mountain covered by clouds/one super cloud.
I thought of having two mountains that are covered by a cloud and are visible in the day so it will have a coolness to it but also a warm feel.
I think I will use the painting as well look at other different Victorian paintings to give me the idea of the type of colours I want for my pub scene.


Painting Designs.

That is all I have to show for now, and to recap on my next approach on my project I will look at some more Victorian paintings to see what colours I will use for my pub scene, learn about three point lighting in maya and see is using a toon shade or highlights will make my render look better. So until next time this is by for now.

Sunday 2 February 2014

Shub-Work 02: New Albert Animatic *Update*

*Edited the video so it will play on mobile phones and in higher quality*
Here is the latest version of my Albert animatic, sorry it took so long to finish it. I only changed the intro so the short will be more interesting to watch. Leave some feedback so I will know what you think.


Here are the old ones if you want to see a comparison of how much of a different there is when compared to the old animatics and the newset one.


Now all that's left is to make the short and give my short a better title.

I might need to ask help on how to make a control to select all the controls on the character's rig so I can key them all at once *cough* Alan and Ethan Shillings*cough* lol.

Thursday 16 January 2014

Sorry for the Major Delay of Posts.

Hey everyone hope you are enjoying the new year. Sorry I wasn't blogging for roughly the past two months but I do have a good reason.
Near the end of November to the beginning of January I actually had two jobs one at Odeon and one at Sainsbury's and let me tell you it was hard working at both jobs. Luckily Odeon was temporary so I only had to last for one month. However I am on probation at Sainsbury's so I won't know if they want me to work there permanently until, I believe, in March.
I won't lie it was very hard working at both places, mostly trying to balance my rota so I can try to work at both jobs. There were times that I wanted to quit , mainly during the first week because I had to be in at both Odeon and Sainsbury's on the same day but not the same time. However I suck it up and tried my best to work at both companies and it was worth it because now I will have some money which I will use to upgrade my PC.
I haven't upgraded my PC yet because I still need more MONEY, wow I sound like Scrooge before he changed.
Even though I left Odeon I will miss working with the employees there because they were fun, Sainsbury's employees are fun too it just I won't meet the employees at Odeon as much as I want, unless I want to watch a film lol.

Have you guys worked at two or more jobs before let me know as for me it's back to posting on my blog from once every two weeks/month. So until next post take care.

Wednesday 6 November 2013

Shub-Art Work in Progress 02: Bayonetta, Plus a competition to win a free Mischief drawing software.

Hey everyone sorry I have not been posting much on my blog lately, I was looking for work and I went on vacation on the weekends. I also got two things I want to post: an update to an old picture and a competition that an artist youtuber is taking part in.

First as some of you now besides the Albert animation I am working on I am also drawing a picture of the video game character Bayonetta for my sister.
I have just updated the line art of Bayonetta which was not easy because I had to add all the detail to her weapons and her clothes. Here is a comparison between the old picture I posted on 30th September 2013 and the recent image I finished.

Bayonetta Line Art 1


Bayonetta Line Art 2
The second announcement is that I came across an interesting competition where the lucky person can win a drawing soft named Mischief for free all you have to do is draw using the software. One of the judges is Stevraybro and he posted a video about the competition.

Stevrayrbo's Mischief Contest! - Artistic Escape


If you are interested then take part the theme is Artistic Escape, or try out the software for 15 days at at http://www.madewithmischief.com/downloads.html. Also if you do try it out but don't want to take part in the competition you can by the software for a cheap price, at least when compared to the more expensive digital painting software. Good luck and have fun :)